My iPad is a significant part of my life. It goes almost everywhere with me and is the one device I can’t live without for both work and leisure.
With more educators looking at iPads as a replacement for student laptops and netbooks, we’re regularly being asked for blogging tips using iPads.
So I’ve decided the best way to provide advice is build a new blog using just my iPad and post about it as I go!
Web browsers on the iPad
Lets start by talking about web browsers since you’ll need to use one as you’re setting up your blog.
While Safari is the default web browser on an iPad there are apps that provide considerably better browsing with greater functionality than Safari.
Alternative web browsers for iPads include:
I’ve decided to use iCab mobile because:
- It has the richest feature set
- It supports tab browsing so you don’t have to keep zooming in and out of your browser to move pages
- I’m able to access more blog features inside my dashboard than any of the other browsers
You can choose to use Safari rather than purchase an app like iCab mobile however support of tab browsers makes the process considerably easier and quicker.

Here’s a quick comparison of the main differences between these browsers:

Tip:
- The iPad’s dock at the bottom of the screen where you can ’stick’ icons of your favorite apps so they remain accessible from all other Home screens can hold up to six different apps.
- To add more icons to the iPad dock, or replace existing apps, just touch and hold any Home screen icon until the icons begin to wiggle.
- Now drag the app you want to add from the Home screen into your dock. When complete, press the Home button to save.
The most annoying aspect is Safari is the default browser and, unlike a computer, you can’t change this on an iPad. So instead I’ve added iCab Mobile to my iPad dock to make it easier to access.

Creating the blog
Now it’s time for me to create the blog.
I’m creating it via the Edublogs sign up page using iCab mobile however:
- If you’re new to blogging start by reading these things to consider before creating your blog
- If you’re setting the student blogs follow these instructions
Tip: A handy shortcut is to doubletap on your home button. This brings up a toolbar which makes it easy to navigate around your iPad apps.

Setting up the theme
Now my blog is created it’s time to give it my personal touch by choosing a new theme. Last thing I want is it to look like all the other newly created blogs!
Changing the theme was simple.
All I needed to do was:
- Log into my blog dashboard using iCab mobile (or you can use Safari)
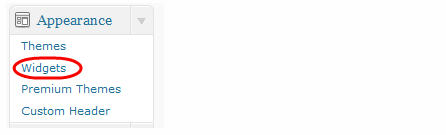
- Go to Appearance > Themes
- Click Activate below the theme I wanted to use
If you’re struggling to decide on a theme it’s best to activate a theme you want to check out and then view your blog in another tab, than to use Preview — it’s less time consuming.

Here’s where you’ll find more information to help you choose your theme:
- What to consider when choosing your blog theme
- The 137 Edublogs Themes Separated Into Categories To Make Choosing Your Next Theme Easier
I’ve decided to use PrimePress because it’s a nice clean theme that suits my purpose.
Uploading the custom image header
While changing the theme was simple, uploading a custom image header wasn’t. It’s definitely something that’s considerably less painful using a computer.
But it can be done and here’s what you need to know:
- The easiest option is to use a free image header that is close to the image header size you need to upload
- You need to use iCab Mobile as most iPad web browsers won’t let you locate images on your iPad to upload
- You need to make sure the image is exactly the size recommended on the Appearance > Custom Header page because you can’t crop images in the dashboard on an iPad
Here’s how I did it:
1. Downloaded a free image header from FreeWebPageHeaders
- Images from FreeWebPageHeaders are a standard size of 800 pixels wide by 200 high which means for most themes you’ll need to resize and crop.

2. Resized the image to 920 pixels wide using iResizer (Us$1.19).
- There’s lots of image resizers you can choose from.
- I just found this app the easiest of the ones I already have and it’s handy to have a good image resizer.

3. Opened up the resized image in PhotoGene (US$2.49):
- cropped to 920 pixels wide and 150 pixels high (size required for uploading)
- Added text
- Saved the image
There’s lots of image editors you can choose from. This app is easy to use and is handy for cool image editing.

4. Then reopened my new custom image header in iResizer to check:
- it was definitely 920 pixels by 150 pixels
- otherwise I wouldn’t be able to upload.
5. Next I logged into my blog dashboard using iCab mobile
6. Went to Appearance > Custom Header
7. Clicked Select File, selected image from Camera Roll and clicked Upload image.
Presto!
My new image header is now on my blog!
You can check out the progress of my blog building on an iPad here!
Changing the tagline
The concept behind a blog tagline is to create a memorable phrase that sums up the tone and premise of a blog.
Changing the tagline was simple.
All I needed to do was:
- Log into my blog dashboard using iCab mobile (or you can use Safari)
- Go to Settings > General
- Add my new tagline and click Save Changes.

Changing Widgets
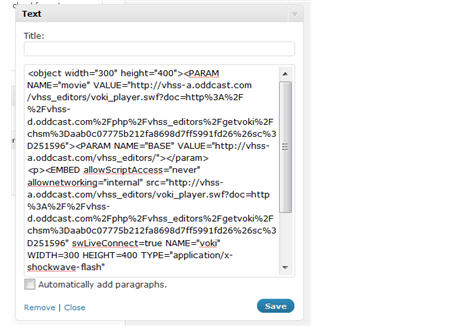
You can’t drag and drop widgets on an iPad.
You can, however, still add widgets with relative ease using the following steps:
1. Select ’screen options’ from the tab at the top.

2. Enable accessibility mode

3. Click add on the widget you want to add

4. Add the information
- In my situation I need to add an attribution for the image I’ve used

5. Then decide where it goes

6. Click Save Widget
You can learn more about working with widgets here!
Final thoughts
My blog is now set up ready for me to start adding content. You can see how the blog is going here (if you can bear it’s current messy state!)
The next post in this series is all about creating and editing posts and pages using an iPad.
Please let us know:
- What have I missed?
- What other advice would you give?
- Or are there any other questions you would like answered?
If you are enjoying reading this blog, please consider  Subscribing For Free!

Generated by BlogIt
BlogIt - Auto Blogging Software for YOU!